Tag Archives: WordPress

Get Started with WordPress

1. As a GDI affiliate, you don’t have to go through the process of registering with WordPress. It’s an option we offer through your account, so you just need to follow the next steps to get started. To access your already created account with WordPress, navigate to your Members Area then to Plugins>WordPress and toggle the on/off button to “On.” The link that appears below with the format blog.yoursite.ws is where you blog will exist.

a. You can have up to five (5) blogs as a GDI Basic Affiliate. To set your blog as your primary webpage simply click the options button to the right of the URL you would like in the plugin area and select “set to primary.”

2. Click on that link to see what your blog currently looks like. Maybe you like this format just fine and want to start posting, or maybe you want to change it completely. Either way you need Editto access the backend to do these things. WordPress calls the main area of the backend the “dashboard.”

3. To access the backend or dashboard, simply return to your plugin area. Near the URL of your blog or site, you will see an edit button. Clicking the edit button will bring you to the Log In area for WordPress. Your user name and password are same as your Members Area user name and password.

4. Once you have successfully entered your user name and password you will be taken to the dashboard. Which should look like the image below. Your dashboard is you main backend area in WordPress where you will be able to find everything you need.Dashbpard2

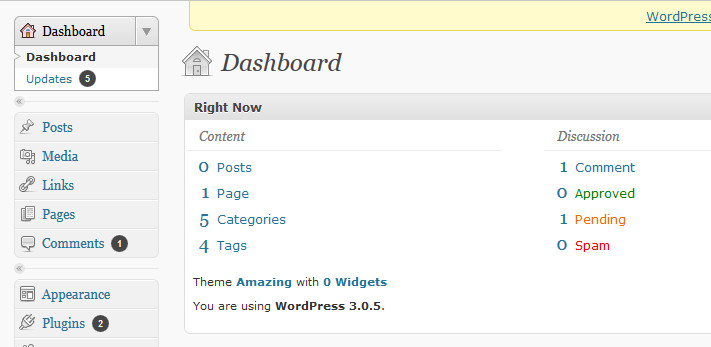
5. If you are happy with the way your blog currently looks, then you can begin publishing blog posts. To create a new blog post, navigate to Posts on the left hand side of the dashboard. When you click on Posts or any of the titles on the left hand side, a submenu will appear. In the Posts submenu you will see Add New, Categories and Post Tags. When you click on Posts, WordPress will take you by default to a list of your past posts, this will appear on the right hand side. WordPress automatically populates a post, which you will see in the list. You can delete that post by selecting Trash from the options that will appear if you hover your mouse over the post title.


Basic SEO Tips for Your WebSite

seo2Website Design

Your website design is important for search engines to be able to find you. Flash only webpages do not rank well in search engines as they can’t tell what your text is. Your site should have a good balance of keyworded text and images as well as all the content you want to share.

Fresh Content

Try to change your content every now and then. Sites that are updated often tend to rank higher in search engine results. This can be as simple as a weekly update on your news or adding timely material that you know needs to be changed out—like a short lived contest or discount. This way you will have hold yourself accountable for updating content and removing dated material.

Links

Links are an extremely important part of SEO and specifically backlinks. An easy way to add backlinks without the help of other sites is to link back to your own content. For example, if it is a blog post and you are referencing a past post, put that link in.

Links back to your blog rank especially high if they are coming from outside pages. So connect up with other affiliates and marketers and share links. Submit content to other websites and request they link back to you if they use it. These are all super simple ways to get your page rank higher in search engines, while simultaneously advertising your site and opportunity.

Blog

If you don’t have the skills or time to update your main website content every so often, consider adding a blog to your site. As you can see HERE getting started with your own WordPress blog is easy, and posting is even easier. Take the time to write a quick update and post it to your blog, search engines will see this is part of your website and that it is being updated frequently, ranking it higher.

Captions

If you use photos on your blog—add captions. This is a simple trick to allow more keywords on your site. Label captions as what they are but use careful consideration or the keywords you want people to hit your site with. You can caption an image of GDIs top tools like Inviter as “Use the tools shown above to be a successful network marketer.” This uses the keyword “network marketer” and explains what your image is a the same time giving you better SEO.

Advanced: How to Add a Favicon to Your WordPress Site

faviconLook up to the corner of the tab above this site. See that little WS image in the corner? It’s a favicon. It’s one more way you can personalize your site. Creating and adding a favicon is easy. Just follow the steps below:

Create a favicon to use

  1. Find the image you would like to use or search for a favicon in your favorite search engine
  2. Take that image and resize it to 16×16 pixels. (You can also find services online that will help you transform any image to a favicon.
  3. Next save the image as favicon.ico. The file extension .ico is very important, make sure you have it right.
  4. Your favicon is ready to be added to your site.

Add a favicon to your WordPress site

  1. Search within your WordPress theme settings. Some themes allow you to easily browse and upload a favicon in a specific place. If you have found this setting, upload your new .ico file and you’re all done.
  2. If your WordPress theme does not have this specific setting, you need to add your favicon using your FTP client. The following instructions come directly from WordPress:
    1. With an FTP Client, upload the new favicon.ico file into your current theme’s main folder.
    2. Upload another copy of your favicon.ico file to the main directory of your site (ie. http://example.com/favicon.ico). This will display the favicon in your subscribers’ readers.

Look up to the corner of the tab above this site. See that little WS image in the corner? It’s a favicon. It’s one more way you can personalize your site. Creating and adding a favicon is easy. Just follow the steps below:

Create a favicon to use

1.     Find the image you would like to use or search for a favicon in your favorite search engine

2.     Take that image and resize it to 16×16 pixels. (You can also find services online that will help you transform any image to a favicon.

3.     Next save the image as favicon.ico. The file extension .ico is very important, make sure you have it right.

4.     Your favicon is ready to be added to your site.

Add a favicon to your WordPress Site.

1.     Search within your WordPress theme settings. Some themes allow you to easily browse and upload a favicon in a specific place. If you have found this setting, upload your new .ico file and you’re all done.

2.     If your WordPress theme does not have this specific setting, you need to add your favicon using your FTP client. The following instructions come directly from WordPress:

    1. With an FTP Client, upload the new favicon.ico file into your current theme’s main folder.
    2. Upload another copy of your favicon.ico file to the main directory of your site (ie. http://example.com/favicon.ico). This will display the favicon in your subscribers’ readers.